Page 8 of 15
Re: My new G80 restoration project (with lots of pictures)
Posted: Sun Mar 31, 2019 8:21 pm
by Group Leader
Wow! - What an amazing transformation AND retained originality too.
It seems, sometimes, you can actually have your cake and it eat it too. Absolutely marvellous.
Alan
Re: My new G80 restoration project (with lots of pictures)
Posted: Mon Apr 01, 2019 3:22 am
by cfaber
Thanks, it's a project that's taken me a while, probably the longest bits waiting for work to be done and having time to actually spend on it.
Only spent five minutes on it tonight, but I think this helps a bit. Originally it had specks of black paint, so I thought, why not? What do you guys think?

Re: My new G80 restoration project (with lots of pictures)
Posted: Mon Apr 01, 2019 9:11 am
by spookefoote1956
If you mean on the mag chain case then nice makes it stand out. I did mine in gold.
Re: My new G80 restoration project (with lots of pictures)
Posted: Tue Apr 02, 2019 4:40 am
by cfaber
Re: My new G80 restoration project (with lots of pictures)
Posted: Tue Apr 02, 2019 9:58 am
by Pharisee
cfaber wrote:
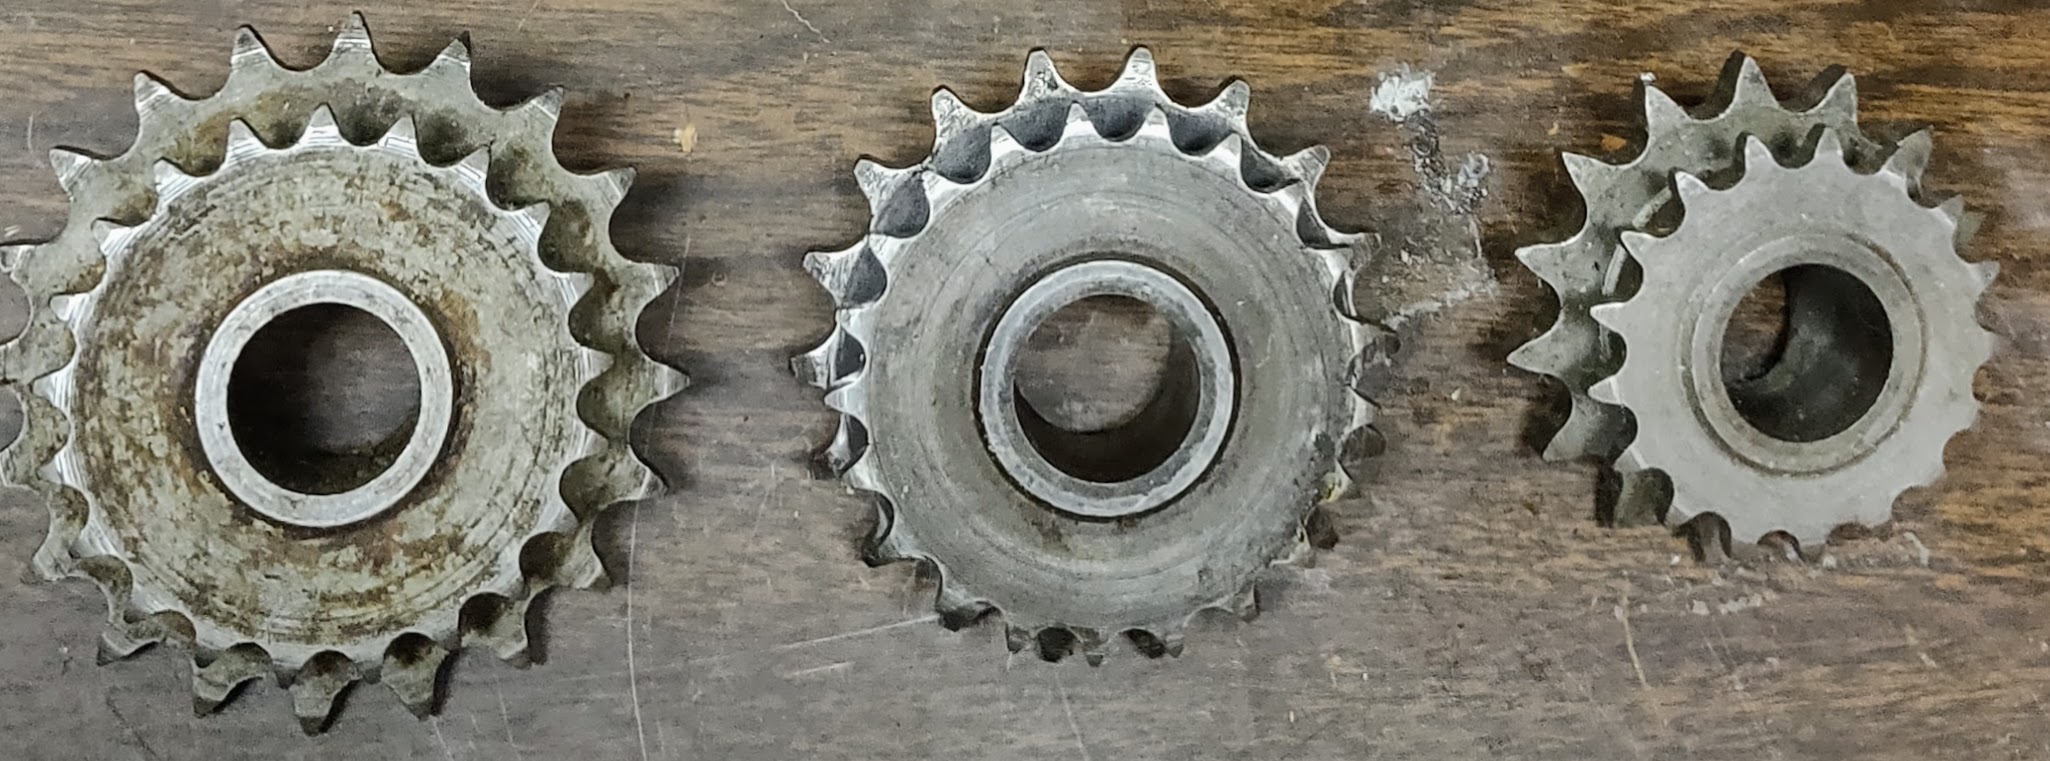
Does anyone off hand know what the stock sprocket was for these bikes?
The engine crankshaft sprocket on my '55 M18S is a 21/21 (Primary drive/dynamo) which I believe is the 'stock' size for the bike.
The final drive sprocket should be 16T giving an overall top gear ratio of 5:1. I'm actually running a 17T final drive sprocket which has raised the overall gearing slightly to 4.7:1.
Re: My new G80 restoration project (with lots of pictures)
Posted: Tue Apr 02, 2019 9:10 pm
by cfaber
Pharisee wrote:cfaber wrote:
Does anyone off hand know what the stock sprocket was for these bikes?
The engine crankshaft sprocket on my '55 M18S is a 21/21 (Primary drive/dynamo) which I believe is the 'stock' size for the bike.
The final drive sprocket should be 16T giving an overall top gear ratio of 5:1. I'm actually running a 17T final drive sprocket which has raised the overall gearing slightly to 4.7:1.
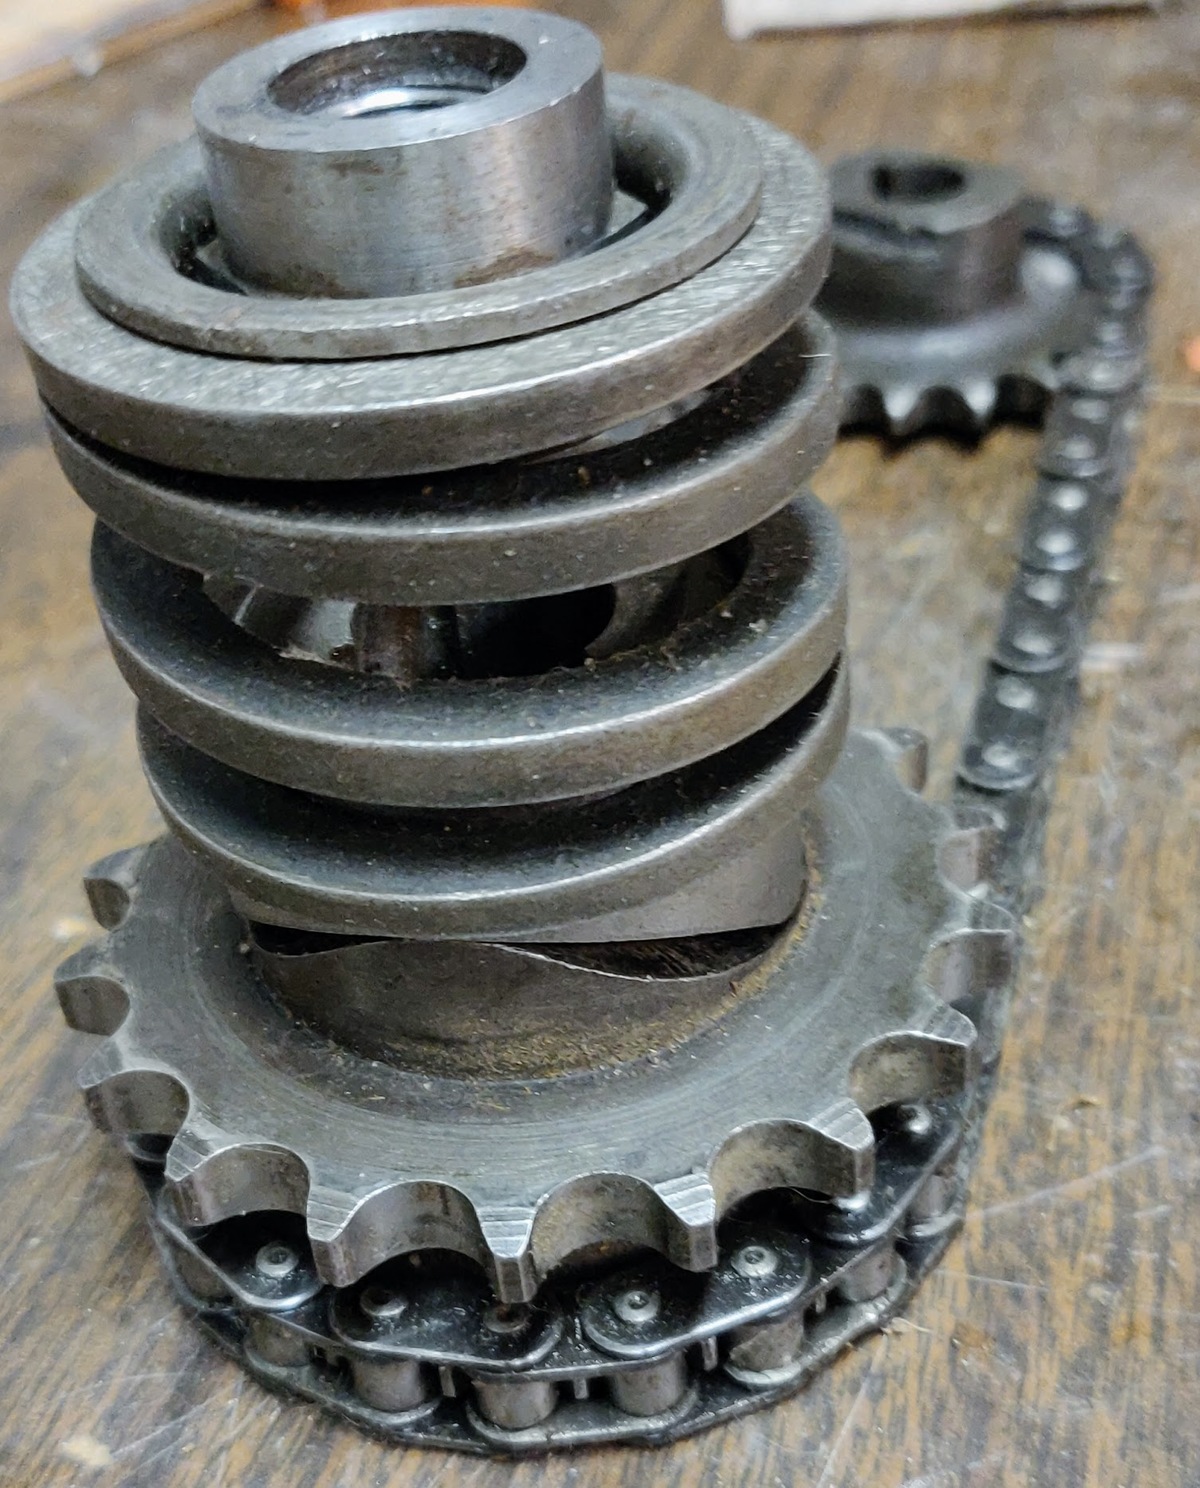
Interesting, the final drive is 16T and none of the three primary/dynamo drives are 21/21
I have a 20/21, 18/21 and 15/17
I guess the previous owner needed more torque, which makes sense given the mountains around here.
Re: My new G80 restoration project (with lots of pictures)
Posted: Sat Apr 06, 2019 7:06 am
by cfaber
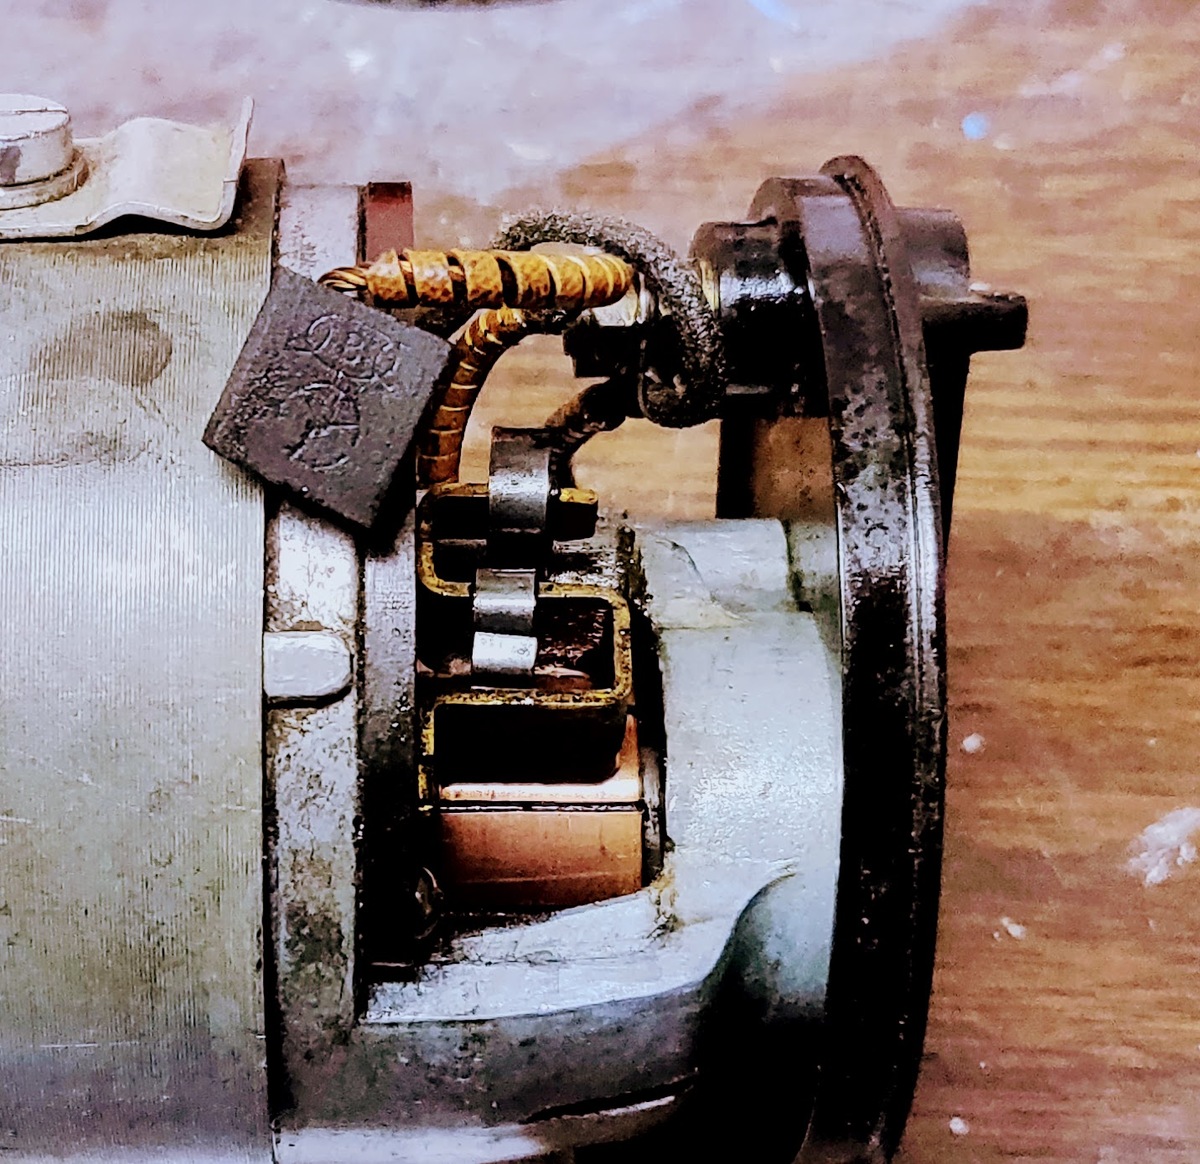
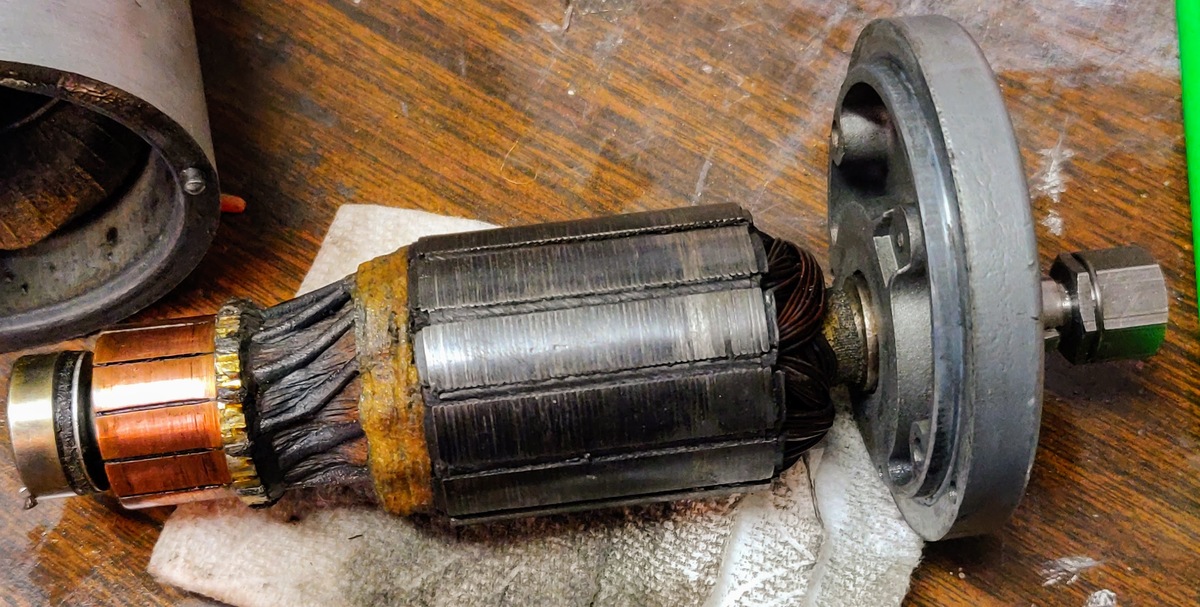
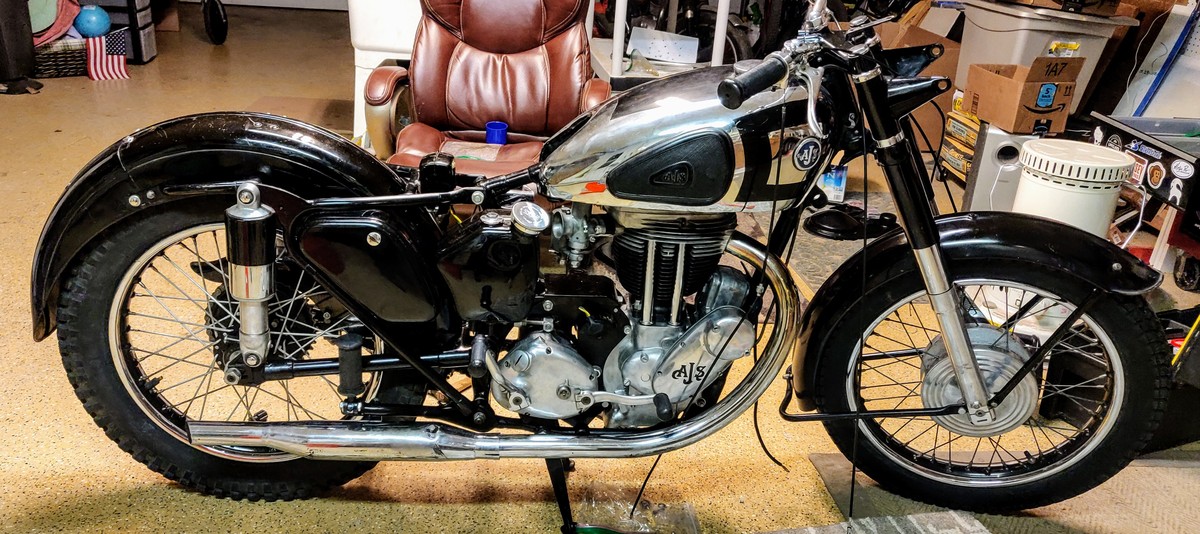
Lots of progress tonight:
- Serviced and woke up the dynamo,
- Serviced the regulator
- Mounted them both.
- Mounted the carburetor
- Reassembled the final drive on the gear box
- Chain is back on the bike (still original chain, says made in england on it!)
- Fittled a bit more with the various bolts, nuts and washers to get the bike more correct.
- Polished up the top of the dynamo cover and reinstalled that
- Knocked the oxidation off the mag housing
- Serviced the automatic advance
and for kicks I put the exhaust back on and set the tank on it to see how it would look.
Things left to do as far as I know at this point
- Install wiring harness
- Front lamp needs to be polished up and mounted
- Carburetor needs it's control wires routed and connected
- Tank needs to be flushed out (just dirty, no rust)
- Reinstall petcocks (possibly service them if they leak)
- Run fuel lines
- Thread seal for the crank case breather pipe
- Hypoid oil for the gear box (unless someone has a better recommendation)
- Oil tank breather hose needs to be connected
- Mag timing
- Push rod adjustment
- Tank mount
- Seat reupholstered
- Stud for front mag mount
- Spacers for lower engine plate
- Repaint the rear number plate
- Paint the new front number plate
- Pack battery box so that the new battery fits better
- Bell out the exhaust end going into the head for a better seal
- Fabricate and patina new oil lines and fittings
- Reinstall and adjust the clutch, primary chain and dynamo chain
- Replace SAE top engine mount bolt with the correct one
- Install the two missing toolbox bolts nuts and washers with the correct ones
- Loctite blue everything that could rattle loose
- Seal and fill the chain case
- Fill the oil tank
- Fill the gas tank
- Replace the tires with road worthy ones (it has the original tires on it!)
- Shrink wrap the entire length of the speedo cable to prevent further deterioration of the leather cladding that's on it and mount it
- Mount the chronometric speedometer

I think that's all, then I can fight with it for a while trying to start it, and hopefully ride it around the block a few times

Re: 1954 18S preservation project (with lots of pictures)
Posted: Sat Apr 06, 2019 9:16 am
by clive
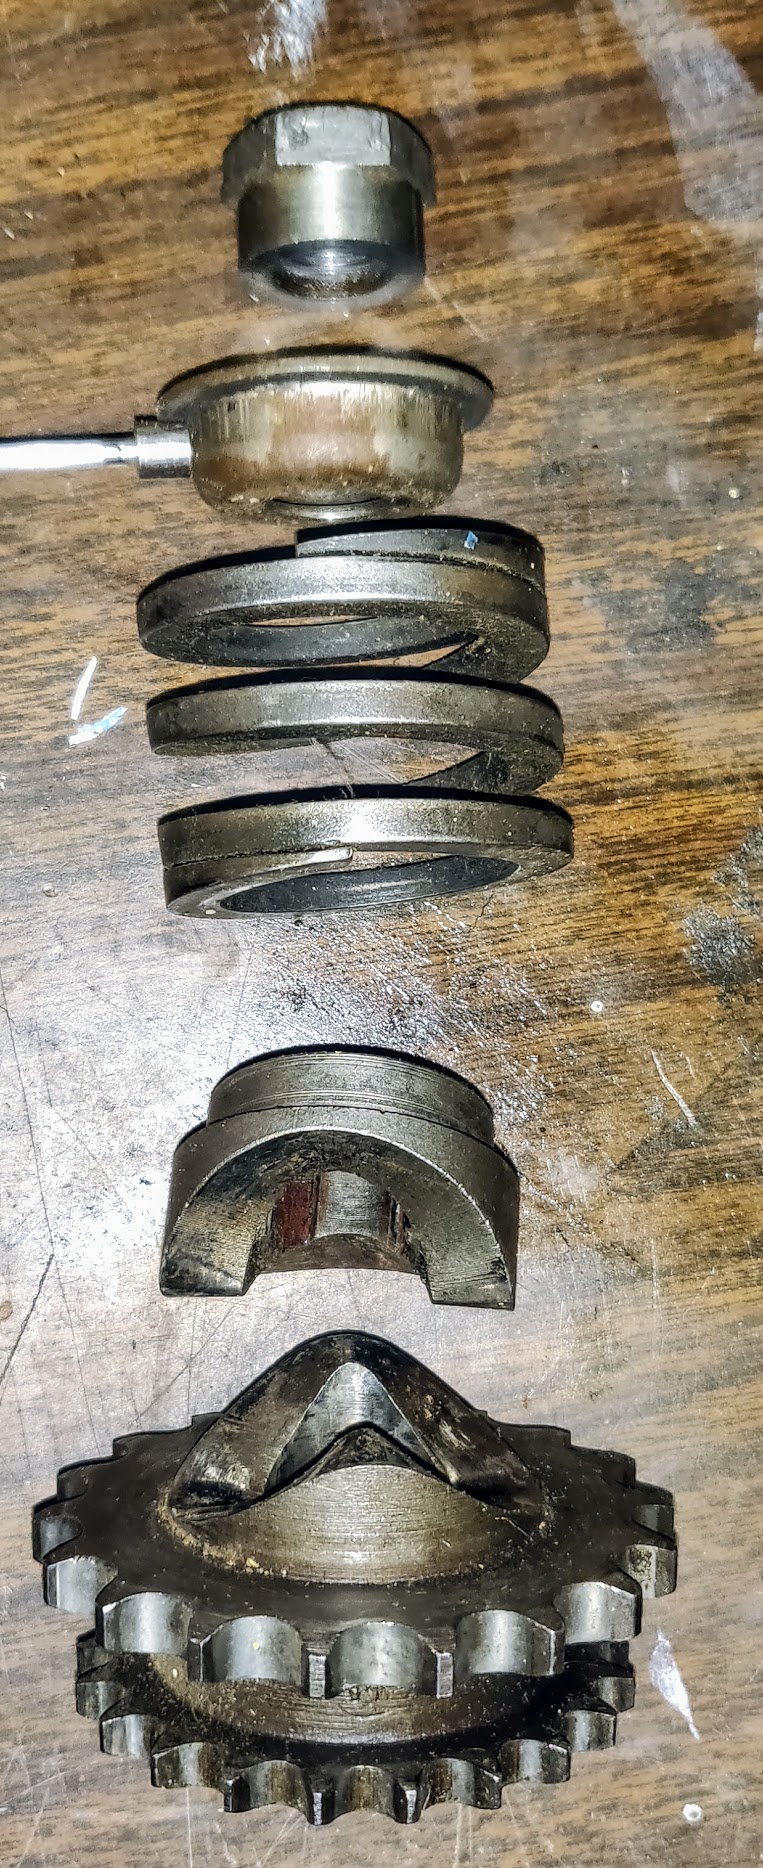
Quick look at your project and I see you are onto the Dynamo. You mention that someone has added a link to the Dynamo chain. It's not clear from the picture but just to warn you that the chains should be endless and have no removeable link. If you do include one the risk of a clash with the primary chain is very much increased (been there done that etc). Club spares have 47, 49, and 50 link ones available.
Oh and the 15/17 would be a trials sprocket but the Dynamo drive would be too slow for night time road use. The 18/21 is the standard 350 ratio, also used by a 500 if pulling a chair. I suggest you go for the 20/21 if you need more grunt for the mountains, but choose between that and the 21/21 before you get the primary chain as they may need to be different lengths.
Re: 1954 18S preservation project (with lots of pictures)
Posted: Sat Apr 06, 2019 6:09 pm
by Pharisee
From F.W.Neill's book :-

Re: 1954 18S preservation project (with lots of pictures)
Posted: Sat Apr 06, 2019 9:49 pm
by cfaber
Thanks guys! Very useful info. It appears the stange link on the dynamo chain is a repair. In the parts I found a broken link with a few other period correct fix-it type kits