1954 18S preservation project (with lots of pictures)
-
cfaber

- Posts: 346
- Joined: Mon Nov 20, 2017 5:37 am
- Location: USA, Colorado
- Contact:
Re: 1954 18S preservation project (with lots of pictures)
Thanks Mick. I know I saw it some place but a quick perusal through the manual didn't yeild anything right away. Cheers mate.
Fix it until it's broken!
Otherwise how will
anything get done?
Otherwise how will
anything get done?
-
Duncan

- Member
- Posts: 2141
- Joined: Thu Jul 10, 2003 1:00 am
- Location: HAMPSHIRE UK
Re: 1954 18S preservation project (with lots of pictures)
Don't forget the washer between the feed union and the engine:
015528 WASHER FOR ENGINE END OIL FEED PIPE UNION 011924
http://www.jampot-spares.com/store/come ... duct=24065
015528 WASHER FOR ENGINE END OIL FEED PIPE UNION 011924
http://www.jampot-spares.com/store/come ... duct=24065
-
cfaber
- Posts: 346
- Joined: Mon Nov 20, 2017 5:37 am
- Location: USA, Colorado
- Contact:
Re: 1954 18S preservation project (with lots of pictures)
Thanks, I've got it, just wasn't installed in that shot.
Fix it until it's broken!
Otherwise how will
anything get done?
Otherwise how will
anything get done?
-
cfaber
- Posts: 346
- Joined: Mon Nov 20, 2017 5:37 am
- Location: USA, Colorado
- Contact:
Re: 1954 18S preservation project (with lots of pictures)
So with the completion of the fittings I needed to finish up the oil lines I was able to get some work done today (as it was snowing all day what else could I do?  )
)
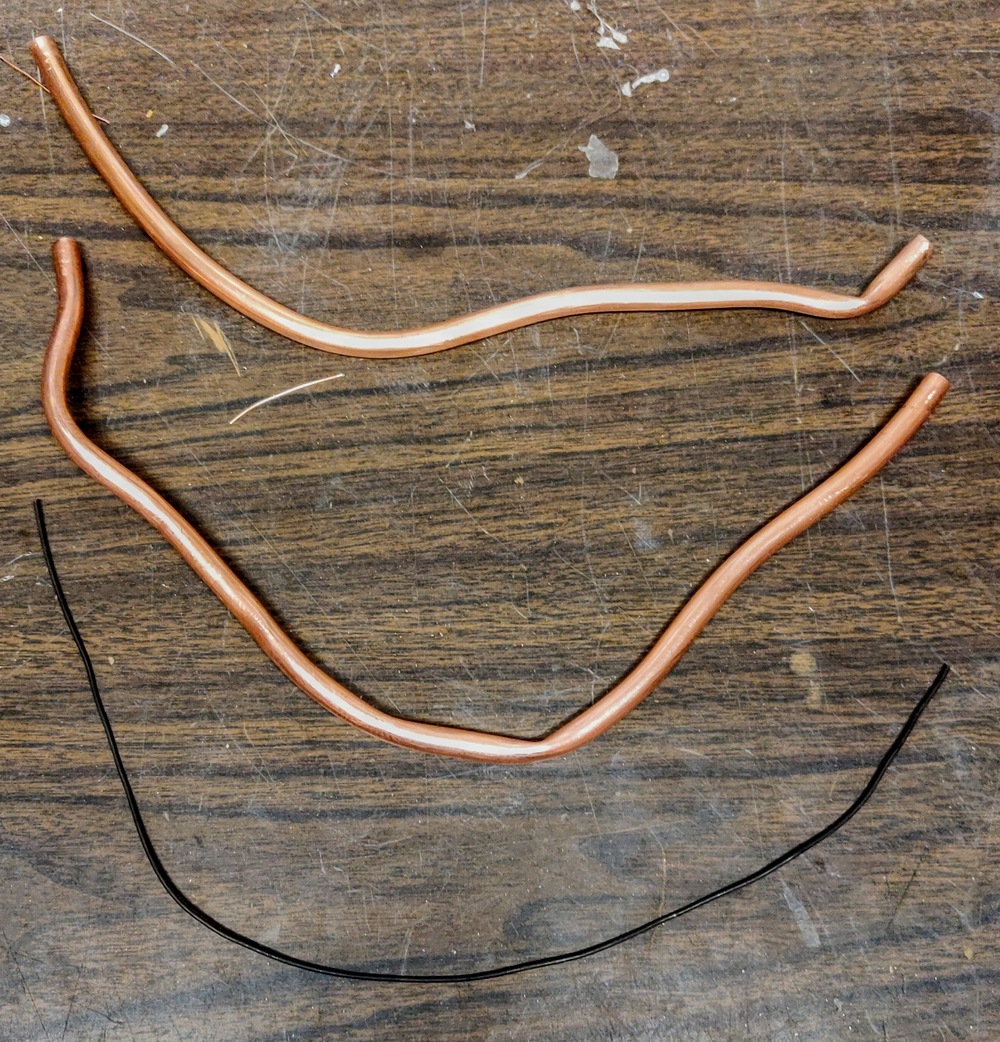
So I started out by just cutting and bending up some steel wire about to the shape I needed for the piping, after that I tried to bend up some of the copper cut to length. I made sure to purchase a reasonable amount since I knew I would be probably making a few of these pipes until I was happy with the bends in it.
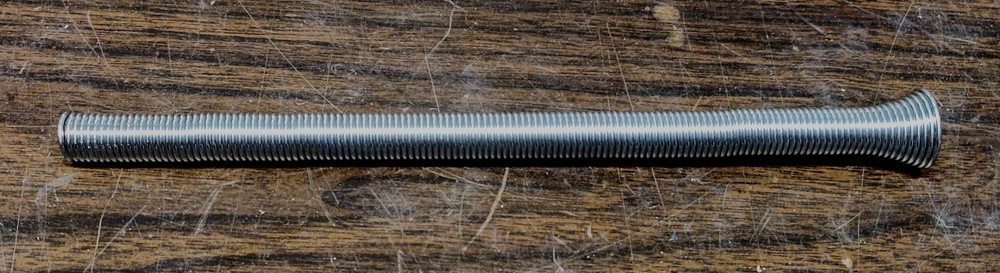
I found that bending this piping was nearly impossible without this tool
But eventually I was some what successful
And again with the other pipe
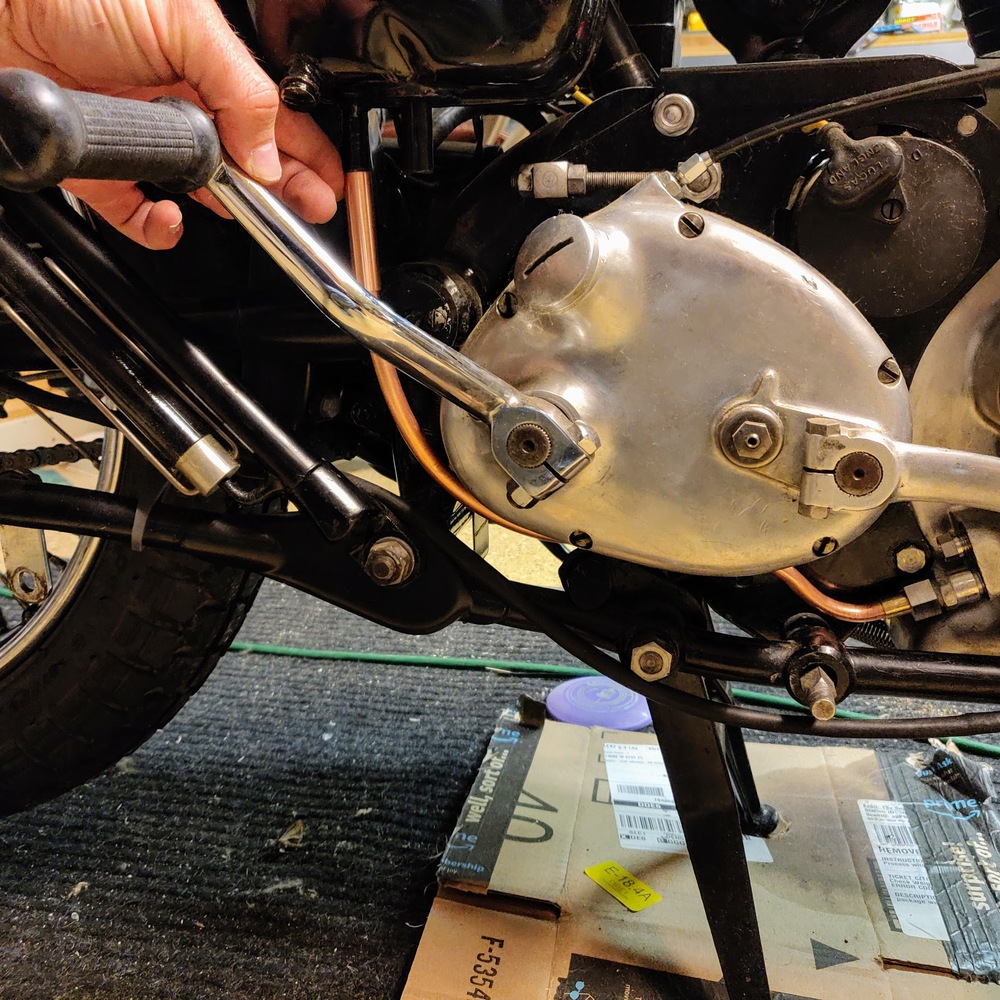
Once everything was measured, marked and fitting the way I wanted I pulled everything off the bike again and sweated the fittings to my newly bent up copper piping
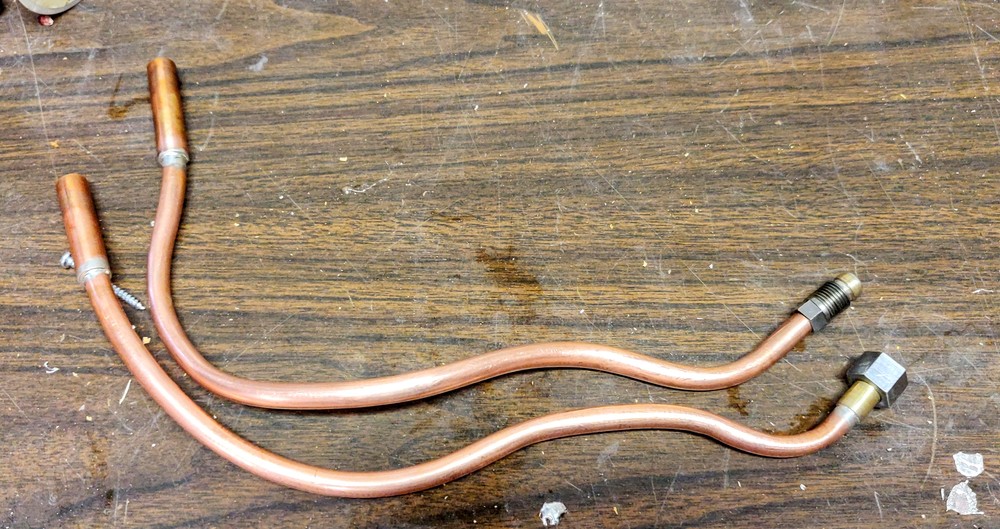
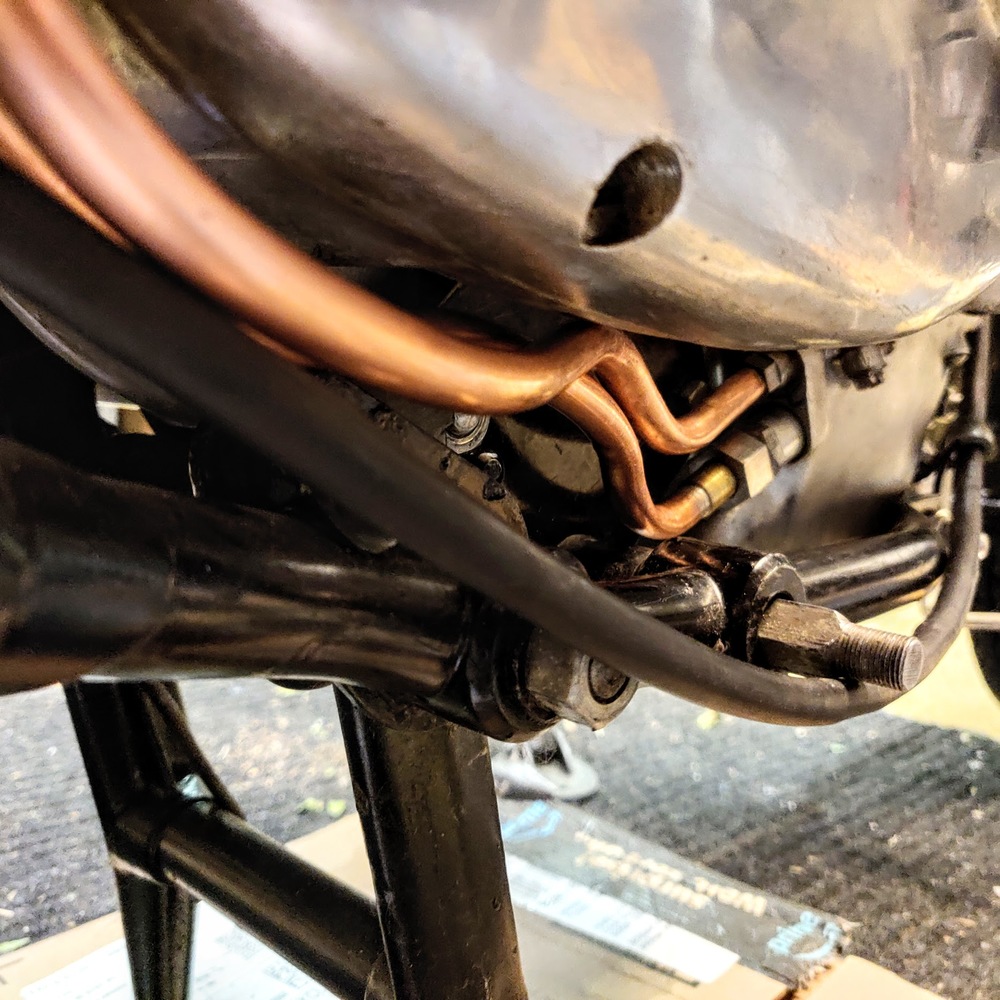
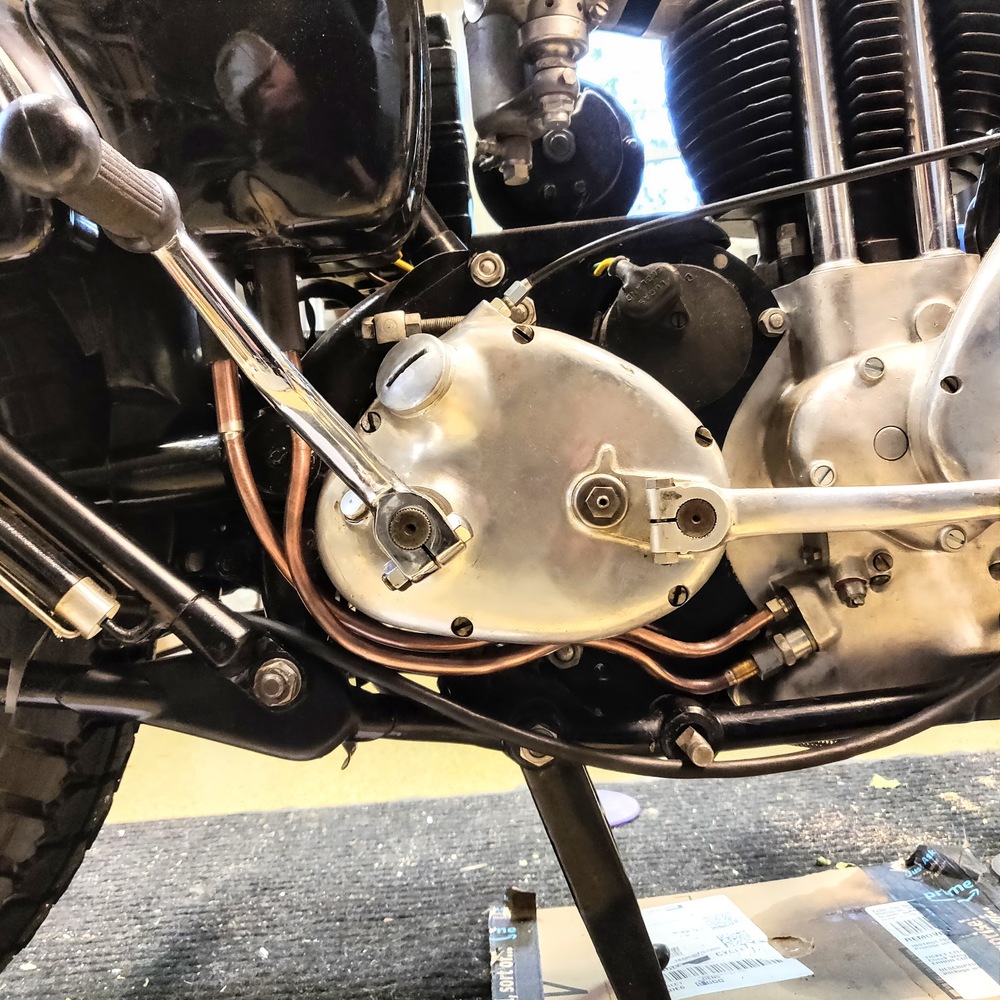
Back on the bike and a little bit of additional slight bending later and they fit well on the bike

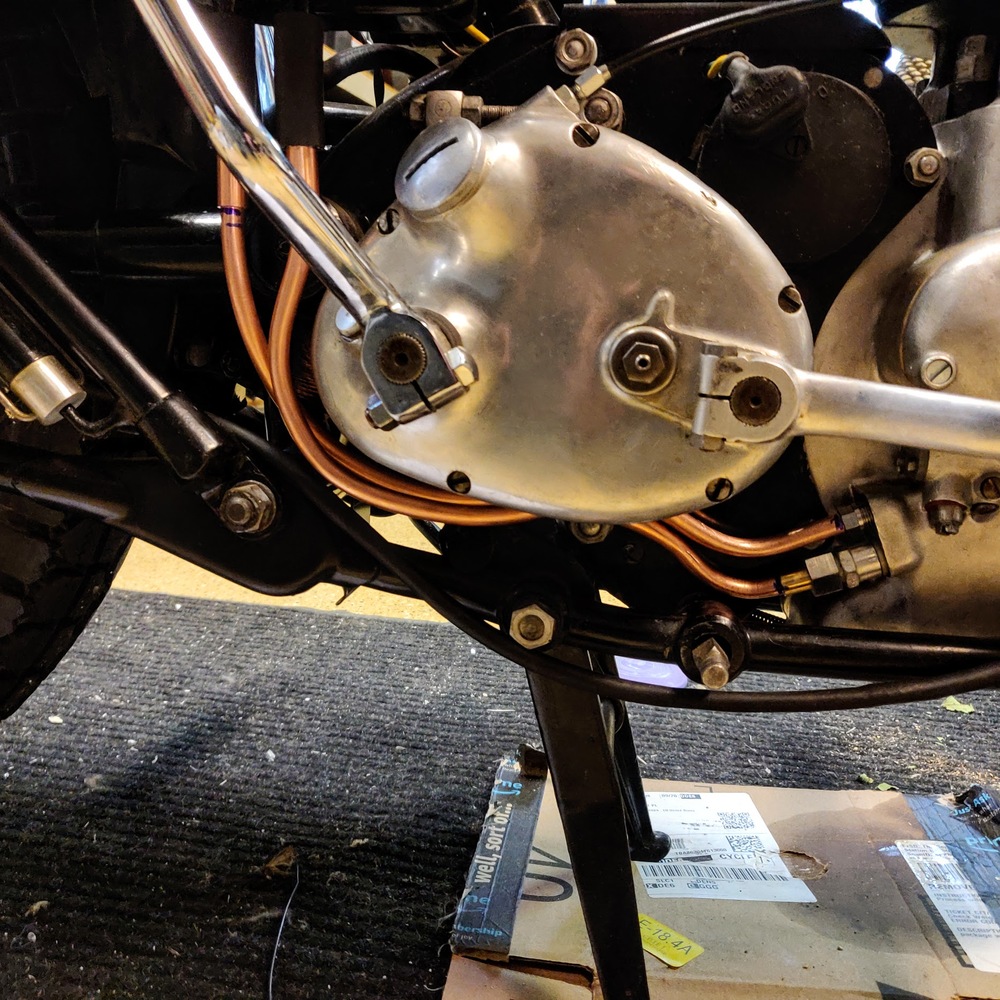
I tried to route the oil lines up and around the center stand stops and it seems to avoid them without problem
Now that this was all done to me, it looks too new (which it should as they're brand new). So to address this I soaked the lines in Liver of Sulfur which reacts with copper to produce a black oxide
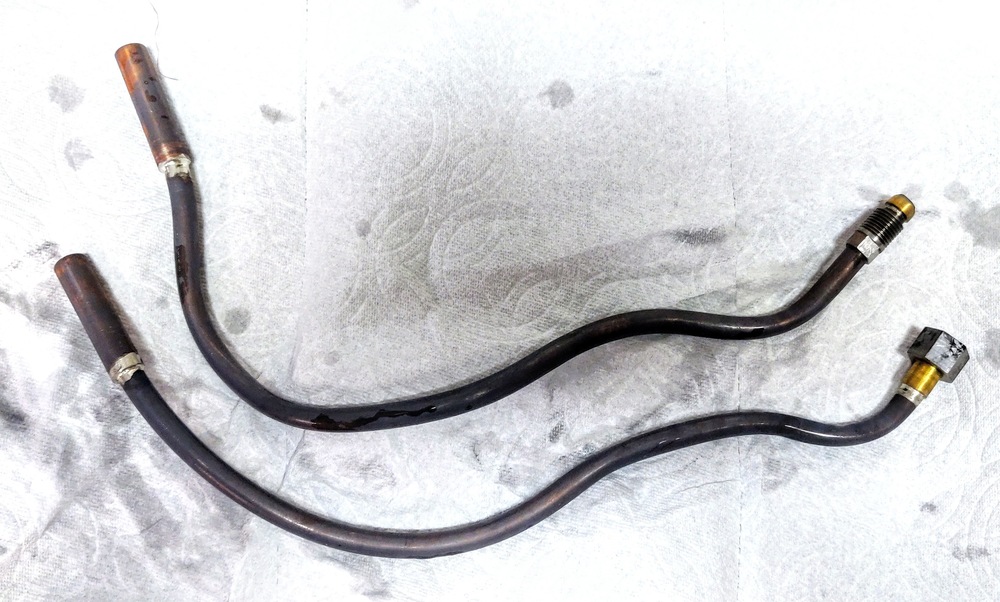
Quick wipe down with some steel wool

and the finished result
I may end up dipping them again, and this time rather than steel wool, boiling them in used motor oil, this may produce a bit closer to the result I'm after but still, I think it looks pretty good as is.

Next is to get oil in it, and see if it can go vroom vroom.
So I started out by just cutting and bending up some steel wire about to the shape I needed for the piping, after that I tried to bend up some of the copper cut to length. I made sure to purchase a reasonable amount since I knew I would be probably making a few of these pipes until I was happy with the bends in it.
I found that bending this piping was nearly impossible without this tool
But eventually I was some what successful
And again with the other pipe
Once everything was measured, marked and fitting the way I wanted I pulled everything off the bike again and sweated the fittings to my newly bent up copper piping
Back on the bike and a little bit of additional slight bending later and they fit well on the bike
I tried to route the oil lines up and around the center stand stops and it seems to avoid them without problem
Now that this was all done to me, it looks too new (which it should as they're brand new). So to address this I soaked the lines in Liver of Sulfur which reacts with copper to produce a black oxide
Quick wipe down with some steel wool
and the finished result
I may end up dipping them again, and this time rather than steel wool, boiling them in used motor oil, this may produce a bit closer to the result I'm after but still, I think it looks pretty good as is.
Next is to get oil in it, and see if it can go vroom vroom.
Fix it until it's broken!
Otherwise how will
anything get done?
Otherwise how will
anything get done?
-
Mick D
- Posts: 2884
- Joined: Mon Mar 24, 2014 5:44 pm
- Location: Aberdeenshire
Re: 1954 18S preservation project (with lots of pictures)
Hi
That's my view on restoration - so satisfying when you do these things yourself, a great result
Keep up the good work
Regards Mick
That's my view on restoration
Keep up the good work
Regards Mick
-
cfaber
- Posts: 346
- Joined: Mon Nov 20, 2017 5:37 am
- Location: USA, Colorado
- Contact:
Re: 1954 18S preservation project (with lots of pictures)
Thanks Mick for the kind words. Yeah honestly, I'd rather have not had to make these oil lines, however I couldn't track down original's and opted to just built them myself. Hopefully no leaks once I get it filled up.Mick D wrote:Hi
That's my view on restoration
Keep up the good work
Regards Mick
Fix it until it's broken!
Otherwise how will
anything get done?
Otherwise how will
anything get done?
-
cfaber
- Posts: 346
- Joined: Mon Nov 20, 2017 5:37 am
- Location: USA, Colorado
- Contact:
Re: 1954 18S preservation project (with lots of pictures)
Hey folks, I'm looking for some confirmation about the valve timing procedure I'm using. Here's the video:
(click)
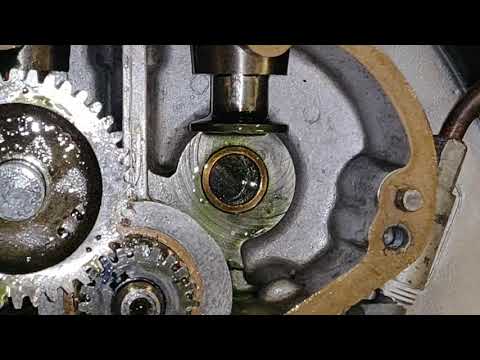
(click)
Fix it until it's broken!
Otherwise how will
anything get done?
Otherwise how will
anything get done?
-
spookefoote1956

- Member
- Posts: 1838
- Joined: Mon May 01, 2017 7:32 pm
- Location: Wales Innit
Re: 1954 18S preservation project (with lots of pictures)
Spot on. The only thing I would have done differently is loosened off the push rods instead of clamping as you will need to check at tdc that they just spin.
Hail Joe Lucas ............ Prince of Darkness!
All my bikes are original........ to me!
"Creativity is your intelligence having fun" Albert Einstein
All my bikes are original........ to me!
"Creativity is your intelligence having fun" Albert Einstein
-
Pharisee

- Member
- Posts: 1128
- Joined: Tue Mar 15, 2016 8:51 pm
- Location: Lincolnshire UK
- Contact:
Re: 1954 18S preservation project (with lots of pictures)
You've done it more or less correcly but you've used the 350cc engine timing dot on the inlet camwheel rather than the 500cc engine dot.cfaber wrote:Hey folks, I'm looking for some confirmation about the valve timing procedure I'm using. Here's the video:
If you read Ken's instructions (page 1, column 2, Cams With Three Dots), he says "If your engine is a 350, fit the cam with the lowest dot in line with the one on the pinion. If it is a 500, use the uppermost of the two."
He also goes on to say (Page 2, Pepping up a 500) that you can use the 350 timing marks on a 500 to improve the performance (It advances the inlet cam timing by 18°). I've done just that on my 18S
John
I'm from the Fens.... Gimme six.
-
cfaber
- Posts: 346
- Joined: Mon Nov 20, 2017 5:37 am
- Location: USA, Colorado
- Contact:
Re: 1954 18S preservation project (with lots of pictures)
He also mentions that you need the different rockers for that change. Is this the case? My concern was in Ken's instructions he didn't mention "turn the engine counter clockwise or clockwise" on the inline cam instructions, so I'm assuming counter clockwise.Pharisee wrote:You've done it more or less correcly but you've used the 350cc engine timing dot on the inlet camwheel rather than the 500cc engine dot.cfaber wrote:Hey folks, I'm looking for some confirmation about the valve timing procedure I'm using. Here's the video:
If you read Ken's instructions (page 1, column 2, Cams With Three Dots), he says "If your engine is a 350, fit the cam with the lowest dot in line with the one on the pinion. If it is a 500, use the uppermost of the two."
He also goes on to say (Page 2, Pepping up a 500) that you can use the 350 timing marks on a 500 to improve the performance (It advances the inlet cam timing by 18°). I've done just that on my 18S
John
Fix it until it's broken!
Otherwise how will
anything get done?
Otherwise how will
anything get done?